As with many things in life, there is more than one way to do it.
Here's the simple way:
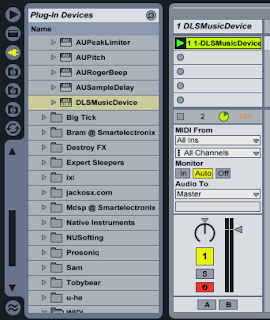 This is just a MIDI Track with the Apple DLS plug-in dropped into it, and then a MIDI Clip is created, and a few note events added. The result uses the first one of the 16 available MIDI channels in the Apple DLS plug-in, and so you can only use it for instrumental voices - there seems to be no way to change the MIDI channel that is used. So if you only need a single channel of basic General MIDI instrument sounds, then this may be all that you need.
Notice here that I've made the Inputs and Outputs visible by clicking on the I-O circle on the far right of the mixer, just to the right of the master volume sliders. What is interesting is that this MIDI Track is behaving exactly as it should - receiving MIDI inputs and converting them into audio outputs. Unfortunately, Live seems to always send MIDI information to the DLS plug-in on MIDI channel 1, and there is no control to change this in the I-O panel. In fact, for this simple example, you do not need to see the inputs and outputs at all.
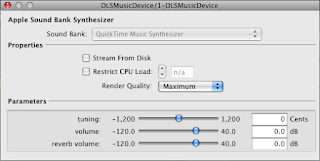 When you drop the DLSMusicDevice onto the MIDI Track, then you this dialogue box will appear. You can set the controls if you have a specific set-up you want to use, but in most cases you will just close this dialogue. You can get it back using the 'spanner' in the assignable X_Y control block that appears at the bottom of the screen in the Clip view.
But there's a better way:
It is more complex, but it allows you to utilise the full capabilities of the Apple DLS plug-in.
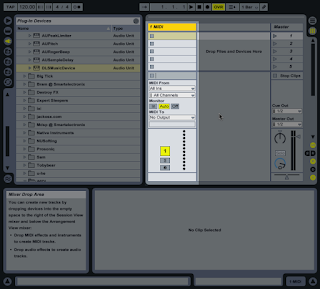 You start in exactly the same way - create a new MIDI Track.
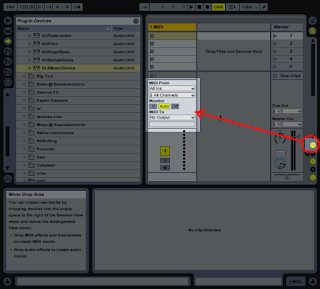 This time, you definitely need to make the Inputs and Outputs visible by clicking on the I-O circle on the far right of the mixer, just to the right of the master volume sliders.
This I-O panel is the key to assigning MIDI channels to the DLS Music Device.
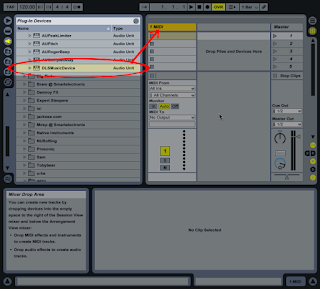 You then drop the Apple DLS plug-in into the MIDI Track. This sets up the DLS Music Device so that it receives MIDI Input and outputs audio into the mixer. But this time we are going to re-route where the MIDI Input is coming from...
(The Apple DLS plug-in is in the Plug-In Devices > Audio Units > Apple folder )
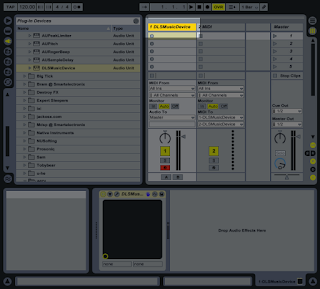 The Track name will have changed to DLSMusicDevice...
 And the Apple Music Synthesizer dialogue box will have appeared... Note that the three 'Parameter' slider controls ( tuning, volume and reverb volume ) are global, and so they affect all the DLS sounds.
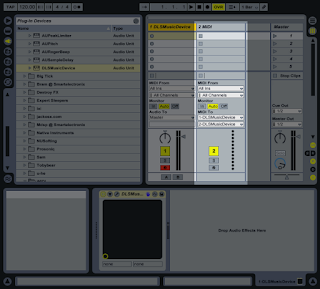 You now need to add a second MIDI Track... This is going to be used to hold the clip containing the note events, and to control the MIDI channel of those events...
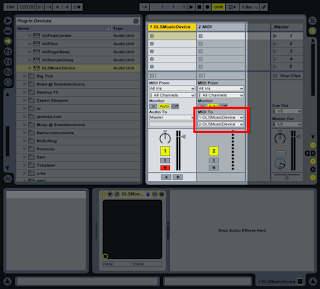 The I-O panel in this new MIDI Track contains this vital pair of controls, which aren't exactly obvious in what they do...
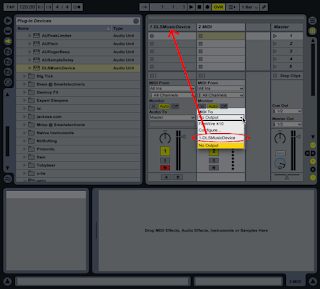 The upper pop-up list control shows a list of the Tracks that the MIDI output from this MIDI Track can be connected to. In this case, we want the output of this Track to go to the DLSMusicDevice, so we select the first Track that we created...
Any note events that we put into a piano roll Clip on this Track will now be routed as MIDI note events to the DLSMusicDevice, which will turn them into audio.
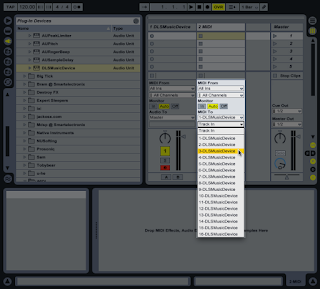 The lower pop-up list control lets you control the MIDI Channel of the note events that are sent to the DLSMusicDevice Track.
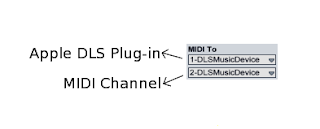 Here's a summary of what the two pop-up controls do...
Notice that the 1-DLSMusicDevice in the top pop-up refers to the plug-in being in Track 1, whilst the 2-DLSMusicDevice in the bottom pop-up refers to the MIDI Channel that the note events will be sent on... If the DLSMusicDevice was dropped into MIDI Track 3, then the top box would say 3-DLSMusicDevice. When you select the target Track with the top pop-up, then the DLSMusicDevice plug-in should be obvious - just make sure that you always look at the lower pop-up to check what MIDI Channel you are using.
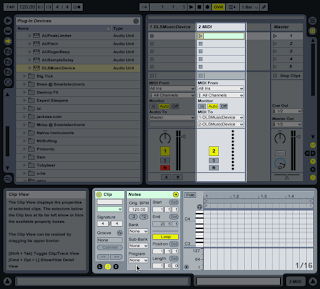 You can now create a new Clip in the new MIDI Track...
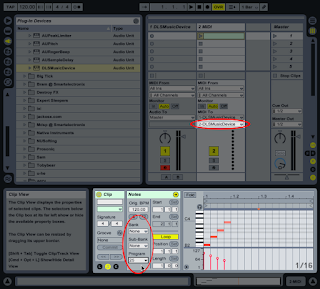 Remember that the lower pop-up selects the MIDI Channel that the DLSMusicDevice will use for this Clip, and the Program Number controls on the left of the Clip piano-roll will select the sound for that MIDI Channel...
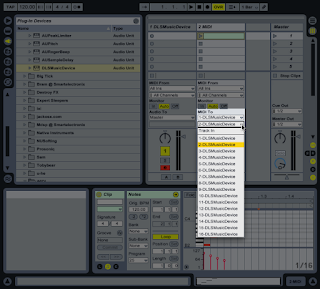 Here's the MIDI Channel pop-up control...
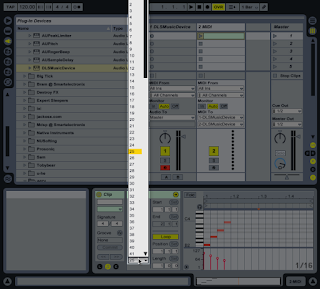 And here is the Program Number pop-up for selecting the sound or instrument. Note that you need to love the slider on the right to switch between low and high numbers, just like in any Live selector control with lots of options.
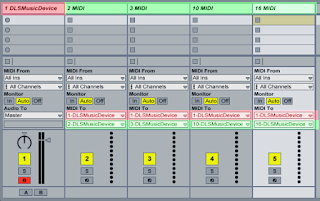 Remember that you can create several MIDI Tracks, assign them to different MIDI Channels (like Channel 10 for Drum sounds) and make the most of the multi-timbral capabilities of the Apple DLS Music Device.
In this example, the top pop-ups all route the MIDI events to the DLSMusicDevice plug-in on Track 1 (shown highlighted in Red), whilst the individual MIDI Channels (set by the lower pop-up) are shown highlighted in green.

![Reblog this post [with Zemanta]](https://img.zemanta.com/reblog_e.png?x-id=39d96c0c-d92f-41a3-85b9-575232841f00)


helpful, thanks bro
ReplyDeleteThis comment has been removed by a blog administrator.
ReplyDeleteThis comment has been removed by a blog administrator.
ReplyDeleteThis comment has been removed by a blog administrator.
ReplyDelete