
For a while now, I have been exploring the edge of the musical map that has 'Probability' on it, off to one side of a region called 'Generative'. But it wasn't until I combined probability with a much older topic, echoes, that things started to get really interesting. One of my very early echo effects was called 'Missing Echo', because it didn't put an echo on every note, and updating the concept with probability, as well as moving the delay into the MIDI domain, started to produce some useful results.
People have been playing around with echo and delay effects for a long, long time. One of the current 'leading lights' is Olafur Arnalds, an Icelandic multi-instrumentalist who has been using custom 'smart delay' software in live performance, and who recently collaborated with Spitfire Audio to release 'Stratus', a toolkit of software and a linked sample library that uses complex delays to augment live performance.
MIDIdelA3

Setting up the memories sounds easy, but there's more to it than meets the eye. Having three different topological connections between the three sections is quite hard to get your head around, and the probability control has more effect that you might think, because when a note has an 80% chance of passing through a section, then that drops when it goes through a second section with 80% probability, and if it goes through a third section, then another 80% probability means that you aren't going to hear that triply-delayed note very often. Then there's the velocity scaling, which reduces the velocity of notes, and which is particularly important when you loop a section, because it keeps things stable, or almost does. Yep, this is one of those delays that can run away with itself...
Inside
I haven't used the MIDI Delay that Ableton include as one of the MaxForLive demos because it is too much like 'a maze of twisty little passages, all different'... Instead I have coded it myself using a different approach, and this probably explains why it 'almost' works - my programming is not very advanced, I'm afraid. But it does get close enough to being usable to be worth revealing, because I'm sure that there are better programmers out there who can improve on the concept...and like all of my software on MaxForLive.com, it is free and unencumbered by rights licensing restrictions.The way that you are supposed to do operations on time-critical events is to time-stamp them as they arrive, and then work your way through a time-based list, so that they are dealt with in strict time order. If you look inside the Ableton MIDI Delay example MaxForLive code then that is exactly what you will find - and there's quite a lot of code in there...
I chose to do it using the much simpler 'cheat's' way. I used two 'pipe' objects, one for the MIDI Note Number values, and the other for the MIDI Velocity values. Normally, when time-stamping a pair of values like Note Number and Velocity, you would group them together as a single event, and give that pair of values a time-stamp. When using two separate pipe objects, then the Note Number becomes one event in a time-delay, whilst the Velocity becomes a different event in a different time-delay. You can probably see why this isn't a perfect solution! But, for 'quick and dirty', it kind of works, and it requires very little coding!
So for the three processing sections (Time Delay, Transpose, Probability, Velocity Scaling, and Looping) there are six pipe objects, arranged in pairs (Note Number, Velocity). These three sections are connected together using a set of 24 switches that do all of the routing for the three different ways that the three sections can be connected (serial, parallel, and a mix). The three connection diagrams look a little bit like the FM 'Algorithm' diagrams that the Yamaha DX7 had on its top panel, and they kind of show the same sort of routing, but nothing more than that.
Using it
Depending on the way that the three processing sections are connected, the basic explanation goes like this: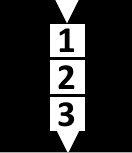
Connection 1 - the serial (top diagram) connection sends the MIDI messages through section 1 (and outputs delayed notes), then section 2 (and outputs delayed notes), then section 3 (and outputs delayed notes).

Connection 2 - the mix of serial and parallel connections (middle diagram) sends the MIDI messages through section1 and outputs delayed notes), and then through section 2 and 3 at the same time (in parallel) (and outputs delayed notes from both sections).

Connection 3 - the parallel (lower diagram) connection sends the MIDI messages through sections 1, 2 and 3 at the same time (and outputs delayed notes from all 3 sections.)
Each section has a separate Loop button, and the Velocity Scaling rotary control acts like the 'Feedback' control in an ordinary audio delay or echo effect. If the Velocity Scaling is set too high, then the processor will quickly become overwhelmed with too much data, and will stop working. This may cause strange noises, which may be loud! Please use the Loop buttons with care. If the device does become overwhelmed, then the 'All' button can be used to turn off any of the Loop buttons.
The Loop buttons can be turned on whilst the device is operating. So you can set up the controls, and then turn on looping for just one of the sections - this is very effective for creating rhythmic 'motifs' and other repeating sounds. The recommendation is that you normally have all of the Loop buttons set to Off, and turn one (or more) on to get a repeated motif for a short time, and then to turn the Loop button off again. This will keep the device stable.
If you have a transpose control set to anything other than the middle 'zero' setting, then using the Loop buttons will quickly cause very low or high MIDI notes to be produced - because the transposition accumulates for each repeat. If you set it for an octave, then after only a few repeats the notes will be at the limit of the MIDI range. Please use the Loop buttons with care when using the Transpose rotary controls.
The Time, Probability and Velocity Scaling rotary controls are not linear - half way round is not half the effect. This is deliberate, and is intended to provide the most control where it is needed. For example, the Velocity Scaling you will use most will be at around 70 or 80%. 100% may cause the effect to be overwhelmed, and is not recommended. Less than 60% will tend to produce only a small number of repeats (echoes).
Note that the Probability rotary control prevents notes from passing through a section. This applies to repeated echoes, so the Probability rotary control and Velocity Scaling rotary control will both reduce the number of repeats (echoes), and will help to prevent the device from being overwhelmed.
To store settings that you like in a preset 'memory', shift-click on the relevant grey square in the lower left hand corner. To recall a 'memory' preset, just click on the relevant square (it will change to white), or use the 'Preset' rotary control. If you use the 'Save' icon on the upper right of the device, then you can save your settings in a file inside Ableton Live, ready for use next time.
MIDIdelA3 is a sophisticated MIDI delay unit. It is capable of some interesting effects, including some that are not normally found in echo or delays that process audio signals (digital or analog). Please be aware that too many notes played at once, or high settings of Probability or Velocity Scaling may cause the processor to become overwhelmed, so take care. The red '!' round button is a placeholder for a future method of stopping the processing from becoming overwhelmed.
MIDIdelA3 sometimes behaves strangely with some instruments, and you may experience 'held' or 'stuck' notes. I am still trying to find out why this happens... For your first testing, please use a percussive sound that decays to nothing relatively quickly, rather than a sound that sustains.
Remember that this is an experimental MaxForLive device, and it is not perfect. Some of the links below may provide more robust, similar and more advanced versions of the effects that MIDIdelA3 produces, and should be researched if you want to explore this type of MIDI delay further.
Update
Since version 0.03 was published, I have spent a lot of time trying to find out why sustained notes caused so much trouble to this plug-in. Here's what I found...The development of this MaxForLive plug-in started out as an experiment to see what it was like to have delay, transpose, and probability in a single device. Somewhere in there, the idea of putting feedback around it came up, and so I added the velocity scaling in an attempt to ensure that it would be stable. Adding feedback revealed some interesting things that I hadn't noticed up until that point: first, my bright idea to scale the velocity each time a note went round the delay loop, so that it would stop the device from running away, worked, but it didn't do quite what I thought it would. (My assumption (never assume anything!) had been that when the velocity value got scaled down to 1, then eventually a subsequent repeat would have the value zero, which is a note off, and that this would then stop the audio neatly. What actually happened was that it got down to a velocity value of 1, and then sat there, repeating over and over again.
This sort of situation often happens in programming, and there's a great temptation to just fix that aspect. Yep, that's what I did. I added extra code so that when the Note On MIDI message happened, the next note would have a velocity value of zero, (which is the same as a Note Off MIDI message (, and hoped that everything would be fine. the problem with is is that the Note Off message is still in the pipe objects somewhere, and so you get two Note Off messages. And we know that Note Off messages are ignored...
There's a trap here. This is no longer a delay. It has become a Note Off message generator - and those Note Off messages just go round and round and round the feedback loop. And here's where I made the big mistake. I added more code to fix the problem that I had just created. I detected when a velocity value of 1 or less occurred, and then killed that whole message, so that Note On message never got turned into a Note Off message.
What I didn't test was what happened when a note was played that was shorter than the delay time. When I did test this in detail, I discovered that I got hanging notes because the Note Off messages were missing! And why were they missing? Because I was killing Note Off messages! The difficulty here is that Note On and Note Off messages should always be in pairs, and if you start to remove Note Off messages, then you have too many Note On messages and you get hanging notes. Worse still, I was turning Note Ons into Note Offs, so I had no way of keeping track of pairs of On and Off messages. There's no difference between a Note Off message and a Note Off message that used to be a Note On, except that one of these should be followed by a Note Off, and the other should not be!
If I removed all of the Max code that messed around with turning On messages into Off messages, then everything was fine when the Loop was turned off, but as soon as I turned the Loop on, then I got messages going round and round the feedback loop, eventually getting the velocity scaled down to zero, and then the Ons became Offs... For one moment, I did consider putting in a switch connected to the Loop button, so that when Looping was off, I didn't mess about with the Note Ons, but when looping was on, I did mess about. Then I realised that this would probably create a device that created hanging notes only when Loop was on...
At this point, I realised that I was trapped inside the loop of 'You have created unwanted behaviour by fixing unwanted behaviour...'.
A little bit of SWOT analysis told me that the expected behaviour of an echo with feedback was that it would go wrong if there was too much feedback. Unexpected behaviour was that an echo would cause hanging notes. Unexpected behaviour is bad, and so I ditched it. I took out all of the additional Max code that tried to remove the 'runaway' effect when you turned up the feedback too far. And this is version 0.04.
Oh, and I also fixed a few bugs in the horrendously complicated switching - you know those three diagrams that show the three ways of connecting the three processing sections together? Well, surprise surprise, there were bugs in there! For a single, relatively simple device, it is quite impressive that I could get so many things so wrong...
I think version 0.04 should have less hanging notes...
Other MIDI processing devices may exist...
One thing that I have now noticed in other MIDI processing devices is that some of them only operate on the MIDI Note On messages, and so you have to pre-define the length of the notes that are produced. This way of doing MIDI processing had never occurred to me! It avoids any requirement for the processing of Note Off messages, and this should simplify the coding task, I think. If I ever get the time, then MIDIdelA3F may one day get released!Links
Stratus, from Spitifre Audio, is probably the leading edge of current 'smart delay' technology, and combines it with a sophisticated sample library.Midihub, from blokas.io, is a very nice MIDI event processor, patchbay and interface. (Yes, I know it should be MIDIhub, but they never asked me.)
BomeBox, from Bome Software, is a sophisticated MIDI processing, mapping and patching interface that can link a computer and MIDI devices over 5-pin DIN, USB, Ethernet and Wifi, and is also a MIDI host.
Getting MIDIdelA3
You can get MIDIdelA3 here:https://maxforlive.com/library/device/6400/mididela3mr
Here are the instructions for what to do with the .amxd file that you download from MaxforLive.com:
https://synthesizerwriter.blogspot.co.uk/2017/12/where-do-i-put-downloaded-amxd.html
(In Live 10, you can also just double-click on the .amxd file, but this puts the device in the same folder as all of the factory devices...)
Oh, yes, and sometimes last-minute fixes do get added, which is why sometimes a blog post is behind the version number of MaxForLive.com... and pictures may not always be the current version... but Schrodinger's cat's status is permanently uncertain...
Modular Equivalents
In terms of basic modular equivalents, then implementing MIDIdelA3 can be approached from two different directions. A purist will use MIDI processing utilities to delay, transpose, probability-ise, and velocity scale the MIDI information, then connect it to a modular sound generation chain. A pragmatist will use three delays plus some additional processing and work in the analogue domain. Purists will require 3 or maybe 6 MIDI processing utility modules and may need to write some code for some solutions, giving an ME of 3 or 6. Pragmatists will require about three sets of 4 modules (voltage processor for transpose and velocity scaling, delays for the delay, utility for the probability, and a switch for the loop button), giving an ME of 12.---
If you find my writing helpful, informative or entertaining, then please consider visiting these links:


No comments:
Post a Comment